
Table of Contents
chrome //net-internals/#dns
chrome://net-internals/#dns is a Chrome browser page allowing you to view and manage the DNS cache. The DNS cache remains a temporary database of domain names and corresponding IP addresses. Chrome uses the DNS cache to resolve domain names to IP addresses quickly and efficiently.
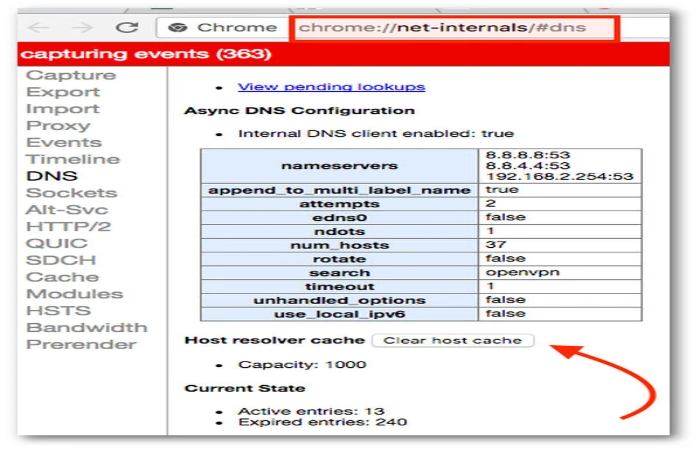
To access the chrome://net-internals/#dns page, open a new tab in Chrome and type the following URL in the address bar:
chrome://net-internals/#dns
This will open the DNS page, showing you all the domain names and IP addresses currently stored in the DNS cache. You can also use the DNS page to clear the DNS cache, which can be helpful if you are having problems connecting to websites.
Click the “Clear host cache” button to clear the DNS cache. This will remove all domain names and IP addresses from the DNS cache. Chrome will then start building a new DNS cache as you visit websites.
It is important to note that clearing the DNS cache will not affect your browsing history or cookies. It will only remove the domain names and IP addresses from the DNS cache.
The chrome://net-internals/#dns page can be helpful in troubleshooting network problems. If you are having trouble connecting to websites, you can try clearing the DNS hoard to see if that fixes the problem.
How Do I Clear DNS In Chrome Net Internals

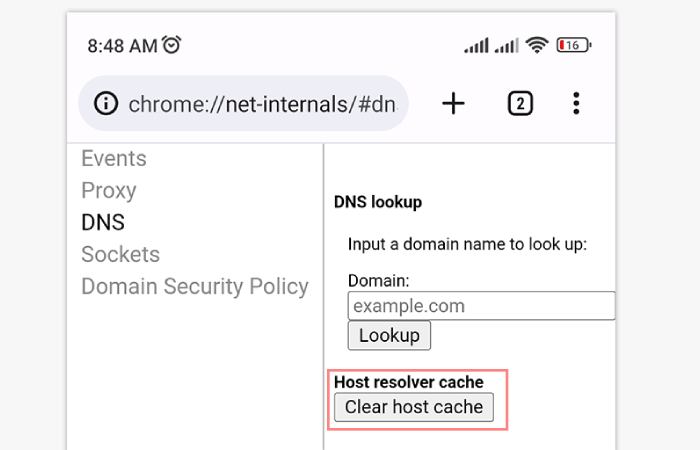
To clear DNS in Chrome Net Internals, follow these steps:
- Open a new tab in Chrome and type the following URL in the address bar:
- chrome://net-internals/#dns
- This will open the DNS page.
- Click the Clear Host cache button.
- This will remove all domain names and IP addresses from the DNS cache.
- Close the DNS page.
- Chrome will then start building a new DNS cache as you visit websites.
Important: Clearing the DNS cache will not affect your browsing history or cookies. It will only remove the domain names and IP addresses from the DNS cache.
Clearing the DNS cache may help if you have trouble connecting to websites. However, if you still have problems, please get in touch with your net service provider [ISP] for assistance.
This will open the DNS page, showing you all the domain names and IP addresses currently stored in the DNS cache. You can also use the DNS page to clear the DNS cache, which can be helpful if you are having problems connecting to websites.
Click the “Clear host cache” button to clear the DNS cache. This will remove all domain names and IP addresses from the DNS cache. Chrome will then start building a new DNS cache as you visit websites.
It is important to note that clearing the DNS cache will not affect your browsing history or cookies. It will only remove the domain names and IP addresses from the DNS cache.
The chrome://net-internals/#dns page can be helpful in troubleshooting network problems. If you are having trouble connecting to websites, try Dell the DNS cache to see if that fixes the problem.
Here are some examples of when you might want to clear the DNS cache:
- You have trouble connecting to a website but can connect to others without a problem.
- You have just changed your internet service provider (ISP).
- You have recently changed your router or modem.
- You have recently connected a new firewall or antivirus program.
It is generally safe if you are unsure whether to clear the DNS cache. However, if you are experiencing any other network problems, you may want to contact your ISP for assistance.
How Do I Clear DNS Cache In Chrome Net Internals DNS
- To clear the DNS cache in Chrome Net Internals DNS, follow these steps:
- This will open the DNS page.
- Click the Clear Host cache button.
- This will remove all domain names and IP addresses from the DNS cache.
- Close the DNS page.
- Chrome will then start building a new DNS cache as you visit websites.
Important: Clearing the DNS cache will not affect your browsing history or cookies. It will only remove the domain names and IP addresses from the DNS cache.
Clearing the DNS cache may help if you have trouble connecting to websites. However, if you still have problems, you may need to contact your net service provider [ISP] for assistance.
Additional Tips For Troubleshooting DNS Cache Issues:
- Try restarting your computer and router.
- Try flushing the DNS cache of your router or modem.
- Try using a different DNS server. Many free DNS servers, such as Google Public DNS (8.8.8.8 and 8.8.4.4) and Cloudflare DNS (1.1.1.1 and 1.0.0.1), are available online.
- Try rotating off your firewall and antivirus programs temporarily.
- If you are still having problems, contact your ISP for assistance.
How Do I Clear My DNS Problem
There are a few things you can do to try to clear a DNS problem:
Restart your computer and router. This can sometimes fix minor DNS problems.
Flush your DNS cache. This will remove all domain names and IP addresses from the DNS cache, which can be helpful if you are having problems connecting to websites. To flush your DNS cache on Windows, open a command prompt and type the following command:
config /flushdns
To Even Your DNS Cache On Mac, Open Terminal And Type The Following Command:
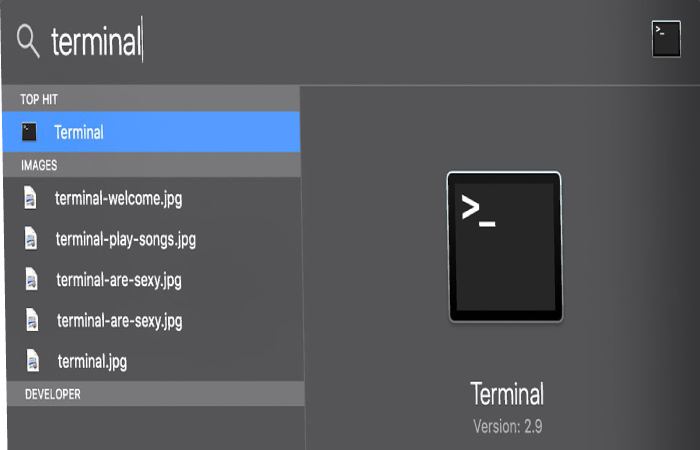
Sudo dscacheutil -flush cache
Change your DNS server. If you still have problems, you can try changing your DNS server. Many free DNS servers, such as Google Public DNS (8.8.8.8 and 8.8.4.4) and Cloudflare DNS (1.1.1.1 and 1.0.0.1), are available online. To change your DNS server on Windows, go to Control Panel > Network and Internet > Network and Sharing Center > Change adapter settings. Right-click on your network joining and choose Properties.
[Click on the Internet Protocol Form 4 [TCP/IPv4] and select Properties. Click on the Use the following DNS attendant addresses radio button and go into the IP addresses of your new DNS servers. Click OK to save your changes. To change your DNS server on Mac, go to System Preferences > Network. Select your net connection and click on the Advanced button. Click on the DNS tab and click the + button to add a new DNS server. Enter the IP address of your original DNS attendant and click OK to save your changes].
Off your firewall and antivirus programs temporarily. If you still have problems, you can temporarily turn off your firewall and antivirus programs. Sometimes, these programs can interfere with DNS resolution.
Contact your ISP. If you have tried the above and are still having problems, you may need to contact your internet service provider (ISP) for assistance.
If you are unsure how to perform the steps above, search online for tutorials or contact your ISP for assistance.
Conclusion
Chrome://net-internals/#dns is a powerful diagnostic tool within Google Chrome that provides insights into DNS resolver cache and related configurations. It helps users troubleshoot DNS-related issues, verify cache entries, and manage DNS settings.